PHOTOGRAMMETRIC ENGINEERING & REMOTE SENSING
May 2020
269
GIS
&
Tips Tricks
By Dave Maune, Ph.D., CP, GS, PS,
and
Al Karlin, Ph.D, CMS-L, GISP
As improved imaging and lidar sensors that produce denser
datasets are becoming more widespread, “big data” has be-
come a buzzword when talking to GIS and Remote Sensing
practitioners. Megabyte-size image and lidar files have been
replaced with gigabyte (and larger) file sizes even when com-
pressed. With the larger file sizes, many software providers
found it necessary to incorporated features to allow users to
manage and process their data more efficiently.
Most GIS/RS analysis workflows start with some type of data
pre-processing and/or loading data, sometimes from multiple
sources, into one or more projects. If the same data are needed
in multiple projects, the workflow can get bogged down as the
user repeatedly selects (and pre-processes) those same files mul-
tiple times. In the example below, we provide a time-saving tip
for loading multiple image files into an eCognition™ “project”.
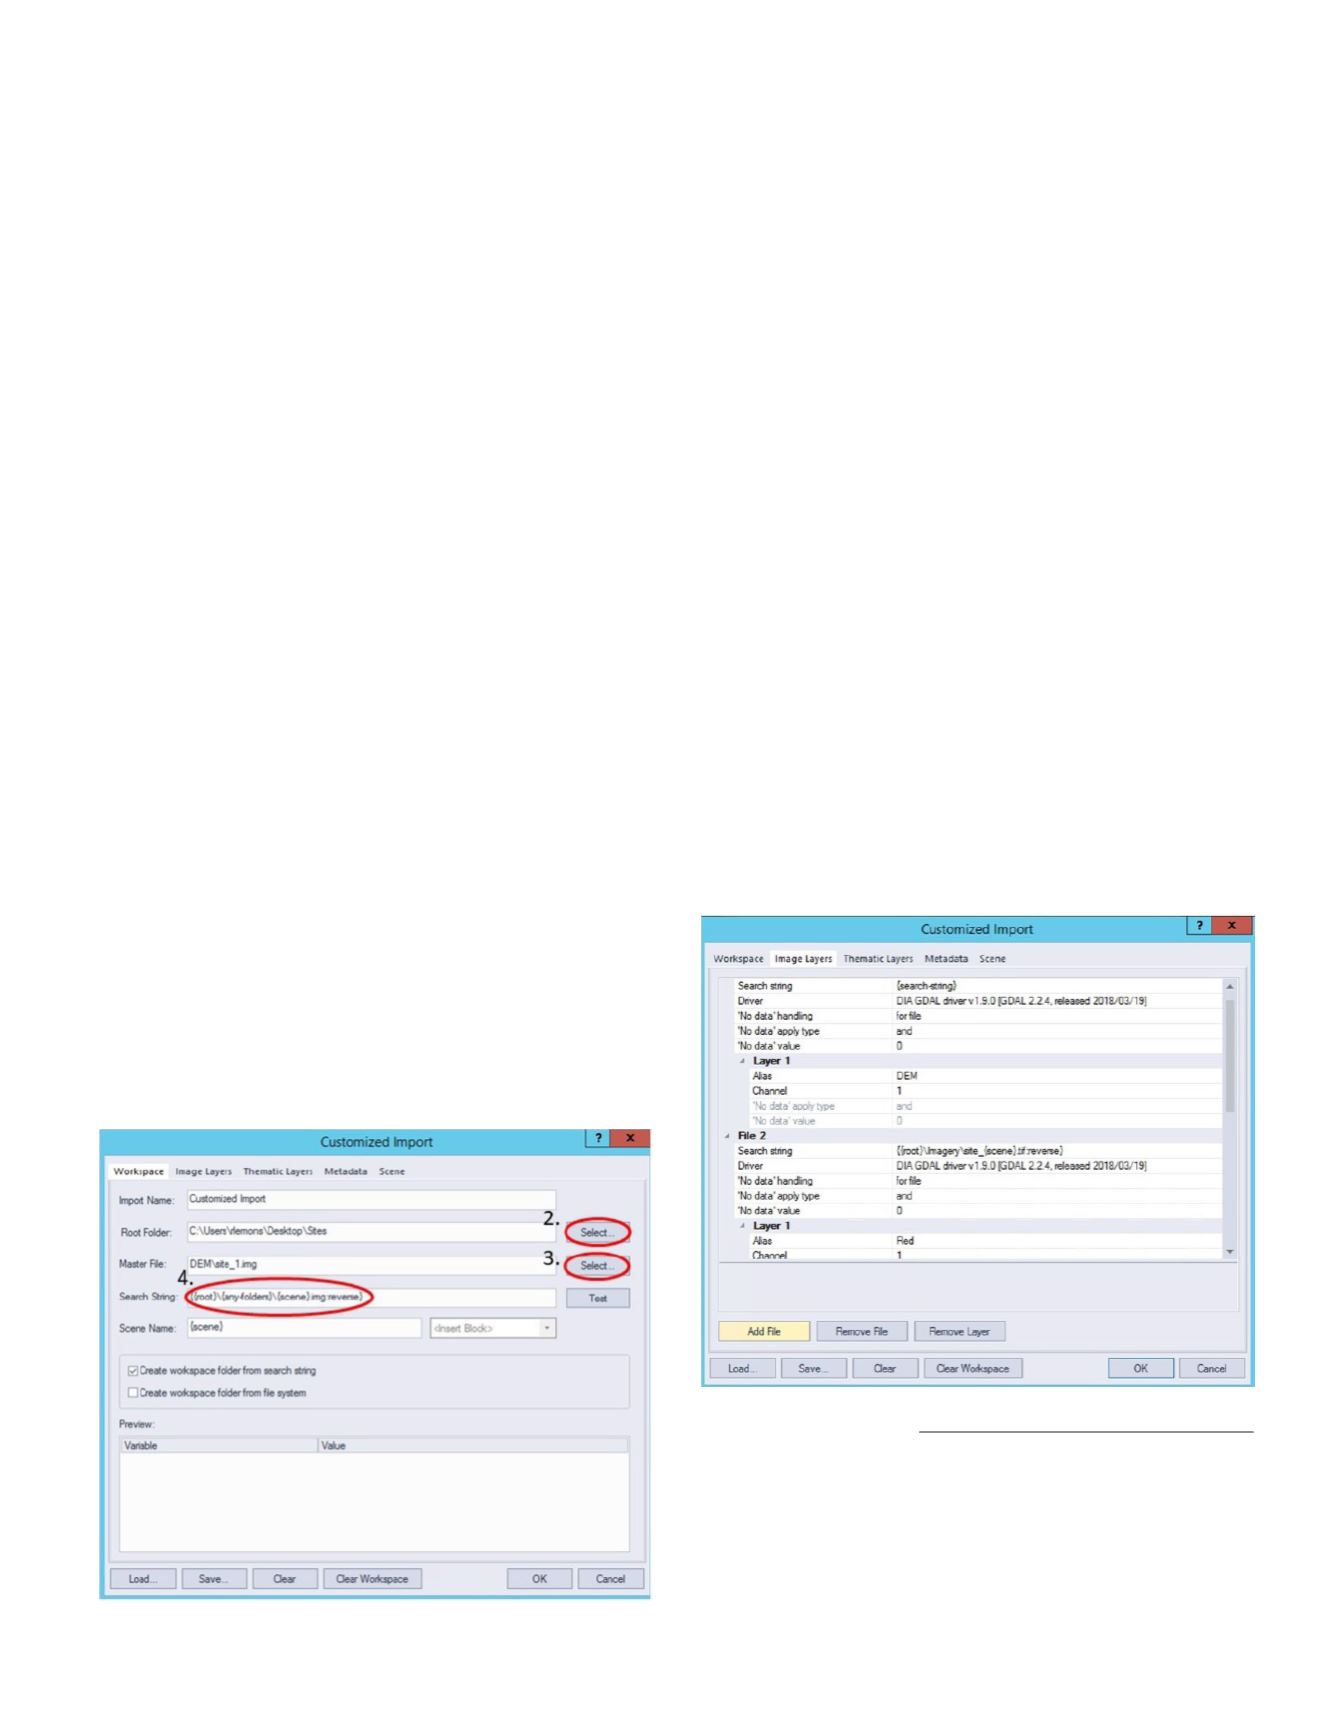
First select the Customize Import under the file tab or by right
clicking on your workspace folder. Open the “Workspace” tab.
1. On the Workspace tab, provide an Import Name (a name
for the import), and choose your Root Folder. Use the se-
lect button to navigate and select the Root Folder. The Root
Folder is the folder containing your image and/or shapefiles
you wish to import.
2. Next you will need to choose your Master File. The Master
File is an example of the file you want to import. Use the
select button to navigate and select an image.
Rebecc Lemons, Ph.D. and
Al Kar in, Ph.D, CMS-L, GISP
Working with Big Data in eCognition™
3. After filling in the Root folder and selecting the Master File,
the search string will automatically update itself. On this
line, {root} references your assigned root folder, {any-fold-
ers} tells the customize import tool to select any of the fold-
ers within your root folder and {scene} tells the tool to select
any image within the folders within your root folder. You
may need to edit your Search String, to make sure every-
thing will correctly import. A common edit is to reference
only one of the folders within your Root Folder. To do this,
click in the field and replace {any-folders} with the name of
the specific folder you wish to reference.
4. Additional options exist under the Image Layers tab to
add supplementary other types of imagery to your project
folder, handle NODATA values, and label the layers within
the Alias field. Shapefiles, metadata, or scenes can also be
added to each project by clicking the tabs at the top. Search
strings may need to be alter if the names or locations are
different than your master file. When you are ready to run
the tool click OK button at the bottom.
Photogrammetric Engineering & Remote Sensing
Vol. 86, No. 5, May 2020, pp. 269–273.
0099-1112/20/269–273
© 2020 American Society for Photogrammetry
and Remote Sensing
doi: 10.14358/PERS.86.5.269


