PHOTOGRAMMETRIC ENGINEERING & REMOTE SENSING
March 2018
119
Data Quality Measures for Quantifying
Geometric Quality
When overlapping swaths of data are available, the geomet-
ric quality of lidar data can be most easily judged by observ-
ing the area covered by overlapping swaths. The underlying
philosophy is that conjugate features observed in multiple
scans of lidar data are consistent and coincident.
Current Methods
There are not many documented methods available for mea-
suring geometric quality. The USGS Lidar Base Specification
and anecdotally, some data providers suggest to rasterize
(or use Triangulated Irregular Model) the overlapping data,
and determine raster differences. Others suggest that a few
points be chosen manually or automatically in the overlap-
ping area and the vertical differences noted. Such methods
may not describe the geometric quality of data completely:
•
All the measurements may not be valid. Measurements
must be made on hard surfaces, and there is no mech-
anism to identify such surfaces in a simple manner.
Measurements made in areas of rapidly changing slope
must be avoided.
•
Only vertical differences can be measured and hori-
zontal errors cannot be quantified. Vertical differences
alone cannot quantify geometric quality
•
Systematic errors are not quantified. Systematic errors
are required to estimate absolute errors in the data but
according to the formulization in the ASPRS accuracy
standards, they are assumed to have been eliminated
•
Swaths may need to be converted to intermediate prod-
ucts (raster/TIN), which are not used anywhere else.
Geometric quality of data can be quantified by measuring the
horizontal, vertical and systematic errors in the data. Cur-
rent methods only estimate the vertical errors. Therefore,
they are inadequate indicators of the geometric quality.
Recommended Data Quality Metrics
A measurement of departure of the conjugate features from
being coincident is termed Data Quality Measure (DQM)
in this document. The DQM is a measure of registration
between overlapping swaths/point clouds, after they have
been geometrically processed to raw geolocated swaths and
before further processing (i.e. point cloud classification,
feature extraction, etc.) is done. The DQM in this document
is based on a paper by Habib et al. (2010), and is based on
point-to-feature (line or plane) correspondences in adjacent
strips of Lidar data. The DQMs are indicators of the quality
of calibration, and they are used to extract relative errors
(vertical, horizontal) in the data and quantifiably estimate
systematic errors in the data.
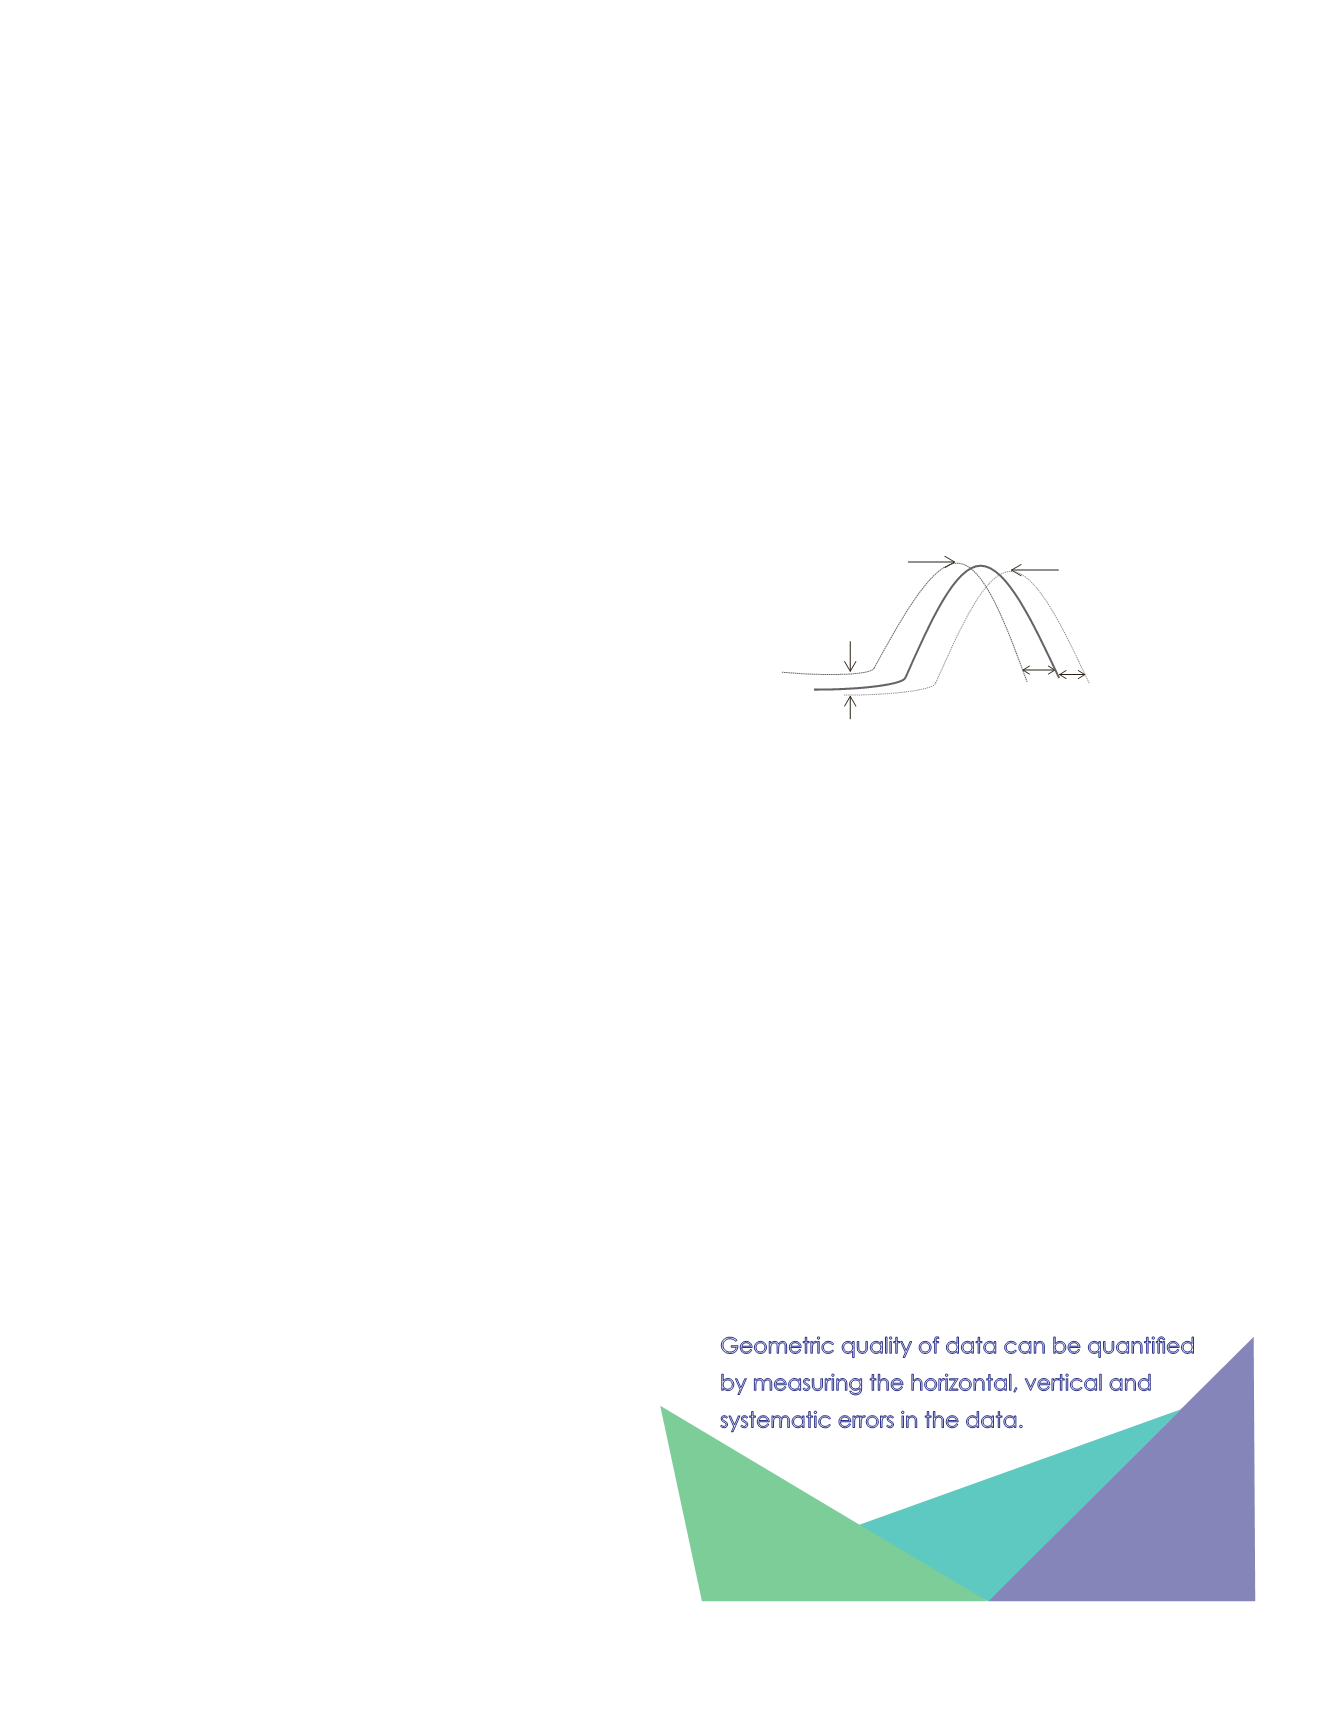
Figure 2
shows a profile of a surface that falls in the overlap-
ping region of two adjacent swaths. The surface as defined
by the swaths is shown in dotted lines while the solid p
rofile
represents the actual surface. A poorly adjusted system leads
to at least two kinds of errors in lidar data. The first one is
that the same surface is defined in two (slightly)
different
ways (relative or internal error) by different swaths, and the
second one is the deviation
from actual surface (absolute er-
ror). While data providers make every effort to reduce the
kind of errors shown in Figures 1 and 2, there are no stan-
dard methodologies in current QC processes to measure the
internal goodness of fit between adjacent swaths (i.e. internal
or relative accuracy).
Current specifications documents (e.g. Heidemann 2014) do
not provide adequate guidance on methods to measure the
inter-swath (internal accuracy) goodness of fit of lidar data.
This is because there are no broadly accepted methods in use
by the industry, and there are only a few scientific papers
that specifically pertain to inter-swath metrics (Habib 2010;
Latypov 2002; Vosselmann 2010). These methods mostly con-
cern themselves with vertical error (Latypov 2002) or involve
feature extraction (Habib et. al; Vosselmann) that may prove
operationally difficult to achieve.
The ASPRS Lidar Cal/Val Working Group is investigating
three quantities (Table 1) that measure the inter-swath good-
ness of fit. These measures describe the discrepancy between
two overlapping point clouds and are often used to obtain op-
timal values of the transformation parameters.
Figure 2: Surface uncertainties in hypothetical adjacent swaths.
Profile of actual surface is shown as solid line while the surface
defined by swath # 1 and swath # 2 are shown as dotted lines.
Absolute error
Rela�ve horizontal
error: not accounted
for currently
Rela�ve ver�cal error
Swath # 1
Swath # 2
Figure2.pdf 1 2/16/2018 2:42:41PM
Geometric quality of data can be quantified
by measuring the horizontal, vertical and
systematic errors in the data.


