PHOTOGRAMMETRIC ENGINEERING & REMOTE SENSING
July 2020
405
GIS
&
Tips Tricks
By Dave Maune, Ph.D., CP, GS, PS,
and
Al Karlin, Ph.D, CMS-L, GISP
Chad Lopez, CMS and Al Karlin, Ph.D,
CMS-L, GISP
There’s More Than One Way to Import Files
It is strange how some GIS tasks are so common that we
almost forget how to do them. Just yesterday, I needed to
map a USGS Water Level Gauge and the only spatial data
available was a geographic coordinate given in degrees (DD),
minutes (MM), and fractional seconds (SS.xx). Of course,
most GIS software packages like to have geographic coordi-
nates expressed as Decimal Degrees (DD.xxxxxx). One of the
quickest ways to convert the DMS or DD coordinates is to use
Excel and two simple formulas.
To convert DMS coordinates to DD (north of the Equator and
west of the Prime Meridian):
Longitude = –1*((DD)+(MM/60)+(SS.xx/3600)) and
Latitude = ((DD)+(MM/60)+(SS.xx/3600)) where DD =
degrees, MM= minutes, and SS.xx= seconds
Using these formulas in an Excel spreadsheet and then im-
porting the spreadsheet into your GIS software is a surefire,
quick workflow to map a few points. However, some GIS
software packages favor ASCII text files (.TXT) or comma
delimited files (.CSV), and this will just add another step in
the workflow. Use the Excel “save as” dropdown and select
the file type needed for your software.
When you only have one or a few points to convert, manu-
ally entering the data into Excel and using the formulas is
a quick workflow, or if the data are already in a projected
coordinate system (Northings and Eastings) but you have
several hundred points. Often, we receive survey data for
lidar ground check points, and the Latitude/Longitude (or
Northing and Easting) data are transmitted as an ASCII
.TXT file or a .CSV file and you need to do some data pro-
cessing before your software can ingest the data. The simple
solution is to Import the file into Excel for processing. In the
examples below, we use camera exterior orientation positions
for an aerial triangulation project, but the process would be
the same if importing survey data.
Here is a familiar icon from the Microsoft Excel
ribbon, the Import from Text/CSV. I’m willing to
bet that everyone reading this column, has at one
time or another, used Microsoft Excel to read-in a
comma delimited file (CSV) or some delimited or free-form
ASCII file containing XY and Height coordinates. However,
sometimes with software upgrades, old familiar workflows,
some that you have used hundreds (if not thousands of time)
need to be altered. When Microsoft updated from the old
“Office Suite” to the new “Office 365” several people around
this office noticed that they were not seeing the usual import
options that they were accustomed to seeing in Excel.
So, here are two quick tips with alternative “new” workflow
for Office 365 users to import CSV and TXT files.
To import a CSV file:
y
In a blank Excel spreadsheet, go to File -> Open and
navigate to your text/CSV file and select it.
y
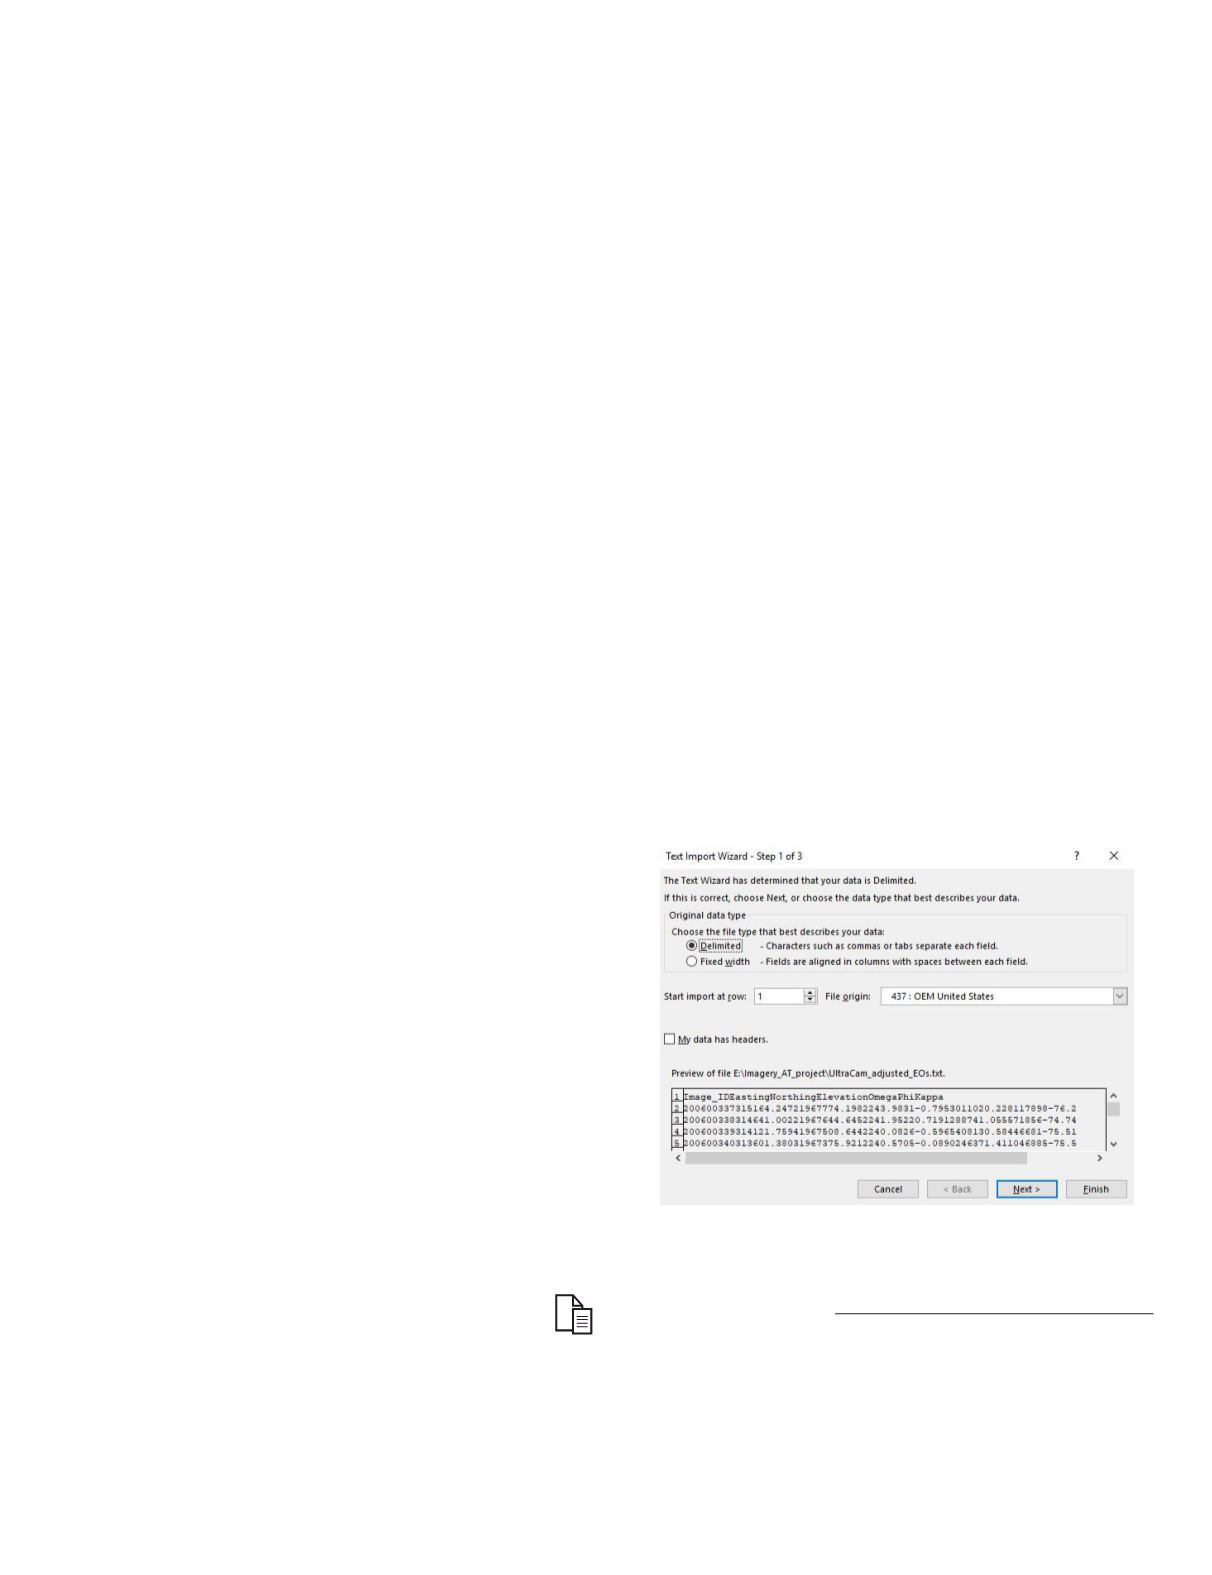
The Text Import Wizard window should then open
with options to choose Fixed Width or Delimited
depending on how your data are formatted, and if
you choose Delimited you can then choose what the
delimiter is.
Step 1—First step in Import Wizard process where you can
choose delimited or fixed width to separate fields.
Step 2—2
nd
step (in this case after choosing “delimited” in
the 1
st
step) where you can choose the delimiter type.
From
Text/CSV
Photogrammetric Engineering & Remote Sensing
Vol. 86, No. 7, July 2020, pp. 405–407.
0099-1112/20/405–407
© 2020 American Society for Photogrammetry
and Remote Sensing
doi: 10.14358/PERS.86.7.405


